

Back to the AAVSO Target Tool
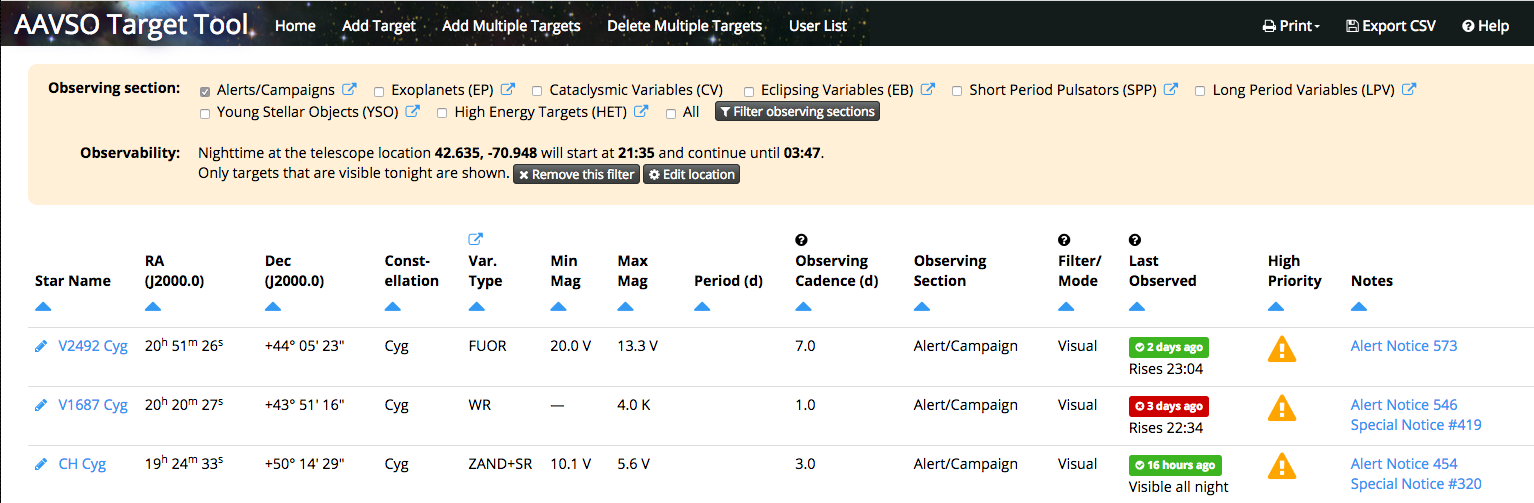
The purpose of the tool is to provide targets that are in need of data to observers who are interested in guidance for their observations. Lists of interesting objects were selected by observing section leaders; their relevant cadence of observations was determined based on individual target characteristics and completeness in our database. Please go to our observing section pages for more information on various categories of objects. An observer can select a combination of targets based on their visibility, magnitude range and object type; multiple categories can be selected simultaneously if desired. Targets that are part of our alerts and campaigns are marked as “high priority”. Multiple entries for each target are possible when specific types of data are requested. Each column can be sorted by using the blue arrows under the header of each column:

This tool is connected to our observing sections; observers will be able to access specific targets of interest through observing section pages. Of course, one can select all categories of targets once they get to the tool.
Individual columns are explained here:
- Star name: this is the VSX designation of a target, and is connected to the relevant VSX entry for more information
- RA/Dec: coordinates of target (J2000)
- Last observed: a flag that changes color based on this target’s needs for more observations. Depending on when data were last uploaded to the AID, there are four types of “flags” for all targets; those flags also indicate how much time has elapsed since the last observation:
- Green flag : stars that have observations within the defined cadence period
- Orange flag : stars that are in need of data, since the last submitted data point is past 90% of defined observing cadence
- Red flag : those that are in need of observations, past the “cadence” time period of observing. “No Observation” indicates that currently there are no data on the star.
- Black flag : stars behind the sun therefore not observable (“near solar conjunction” is when the target is less than 30 degrees from the Sun).
- Constellation: this is the constellation in which a star is located
- Min mag/max mag: the recorded minimum and maximum magnitude of a target
- Period: the VSX period of a target, which is usually the primary period
- Observing cadence: How frequently the target is in need of observations
- Observing section: The AAVSO observing section in which the target belongs to, based on its variability type
- Filter/mode: the filter of needed observations or mode (visual, DSLR, PEP, CCD) for which data are desired. When filter mode is “all”, any type of observations would suffice for the target
- Last Observed: the last time data on this star were submitted to the AID
- High Priority: in the case of alerts and campaigns, a flag will appear to distinguish those targets and ensure they are being observed
- Notes: any notes for specific targets (e.g. ephemerides, info on history, multiple periodicities, etc.)
Select stars from an observing section
At the top of each page, there is a menu of possible types of variable stars that can be selected. By clicking on a specific type name and then hitting “Filter observing sections”, specific stars are added to your list.

More than one category can be selected at a time. Your list can be printed out (in portrait or landscape format), or can be exported to excel (as a csv file).
Setting up an account
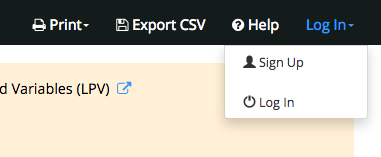
In order to take full advantage of the features of this tool, it is recommended that you set up an account. To do this, click “Log In” in the upper right corner of the screen. In the menu that opens, click “Sign Up”.
This will open a form into which you should enter your name, email (only used for lost password purposes) and a password of your choice.
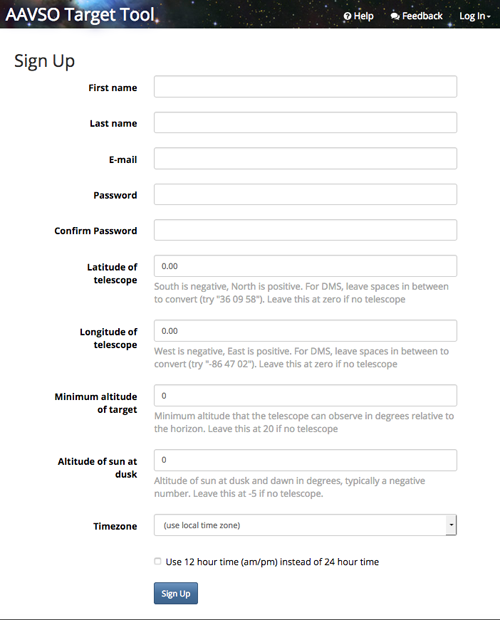
The remaining four fields in the Profile Form are for entering information about your observing site. This will help the tool to determine what stars are visible from your location when you click “Show only targets that are visible tonight” on the home screen.
- Latitude of telescope: Should be entered in degrees with South latitudes negative (+90 to -90 accepted).
- Longitude of telescope: Should be entered in degrees East or West of Greenwich where West longitudes are negative (-180 to +180 accepted).
- Minimum altitude of target: If you have trees, hills or other obstructions in your observing site, or want to ensure that the airmass is not too high, you can use this field to specify the minimum altitude for which targets should be included. Measured in degrees above the horizon (0 to 90 accepted).
- Altitude of sun at dusk: This parameter can be used to specify your preference for the state of twilight marking the beginning and end of your observing night. The value entered must be the degrees below the horizon of the Sun. For example, if you do not plan to observe during Astronomical Twilight enter -18, for Nautical Twilight enter -12, for Civil Twilight enter -6. If you want to see targets that are visible at sunrise enter 0. (0 to -90 accepted).
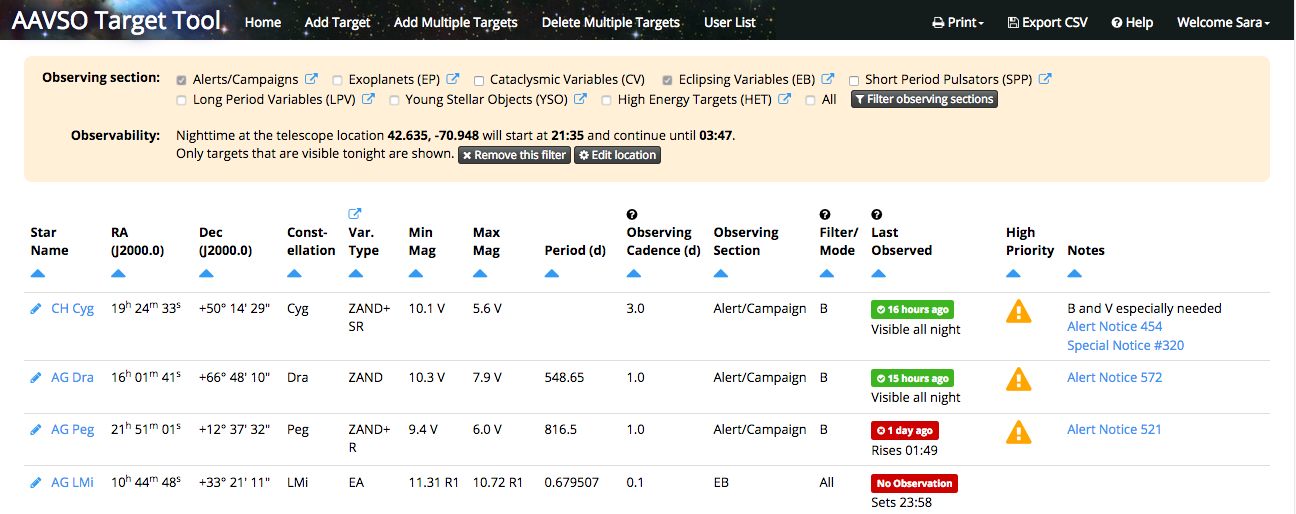
Once your profile is complete, click the blue “Sign Up” button at the bottom of the form to save it. Your telescope latitude and longitude will now show up on the form whenever you log in to the tool. Should you wish to change your telescope location or any other parameters on your profile, click the “Edit Location” button, located under your telescope latitude and longitude displayed near the top of the main page.
Filtering the target list
As long as you have set up a profile with your telescope location, you get information only on targets that are visible from your telescope location: You can filter the list of stars showing on the Target Tool main page by clicking the black “Show only targets that are visible tonight” button located under the telescope location. To remove the observability filter, simply click the same button again. If the list is being filtered, the black button will read “Remove this filter.”
Frequently Asked Questions
TBD